Start with the question your appointment needs to answer. A focused report with the correct dates, units, and log types is usually more useful than sending every record you have.
Decide what the report is for
Before opening the builder, identify the appointment period and the information your healthcare provider requested. This keeps the report readable and reduces unnecessary sharing.
- Confirm the date range, such as since your last appointment.
- Ask whether the recipient wants a readable summary or raw records.
- Include insulin, medications, meals, or notes only when they are relevant.
Open the report builder
Open Settings and choose Report for a doctor. In versions that also expose the action from Insights, choose Create Report there. The builder lets you select a file type, date range, sorting, log types, and available personal details.
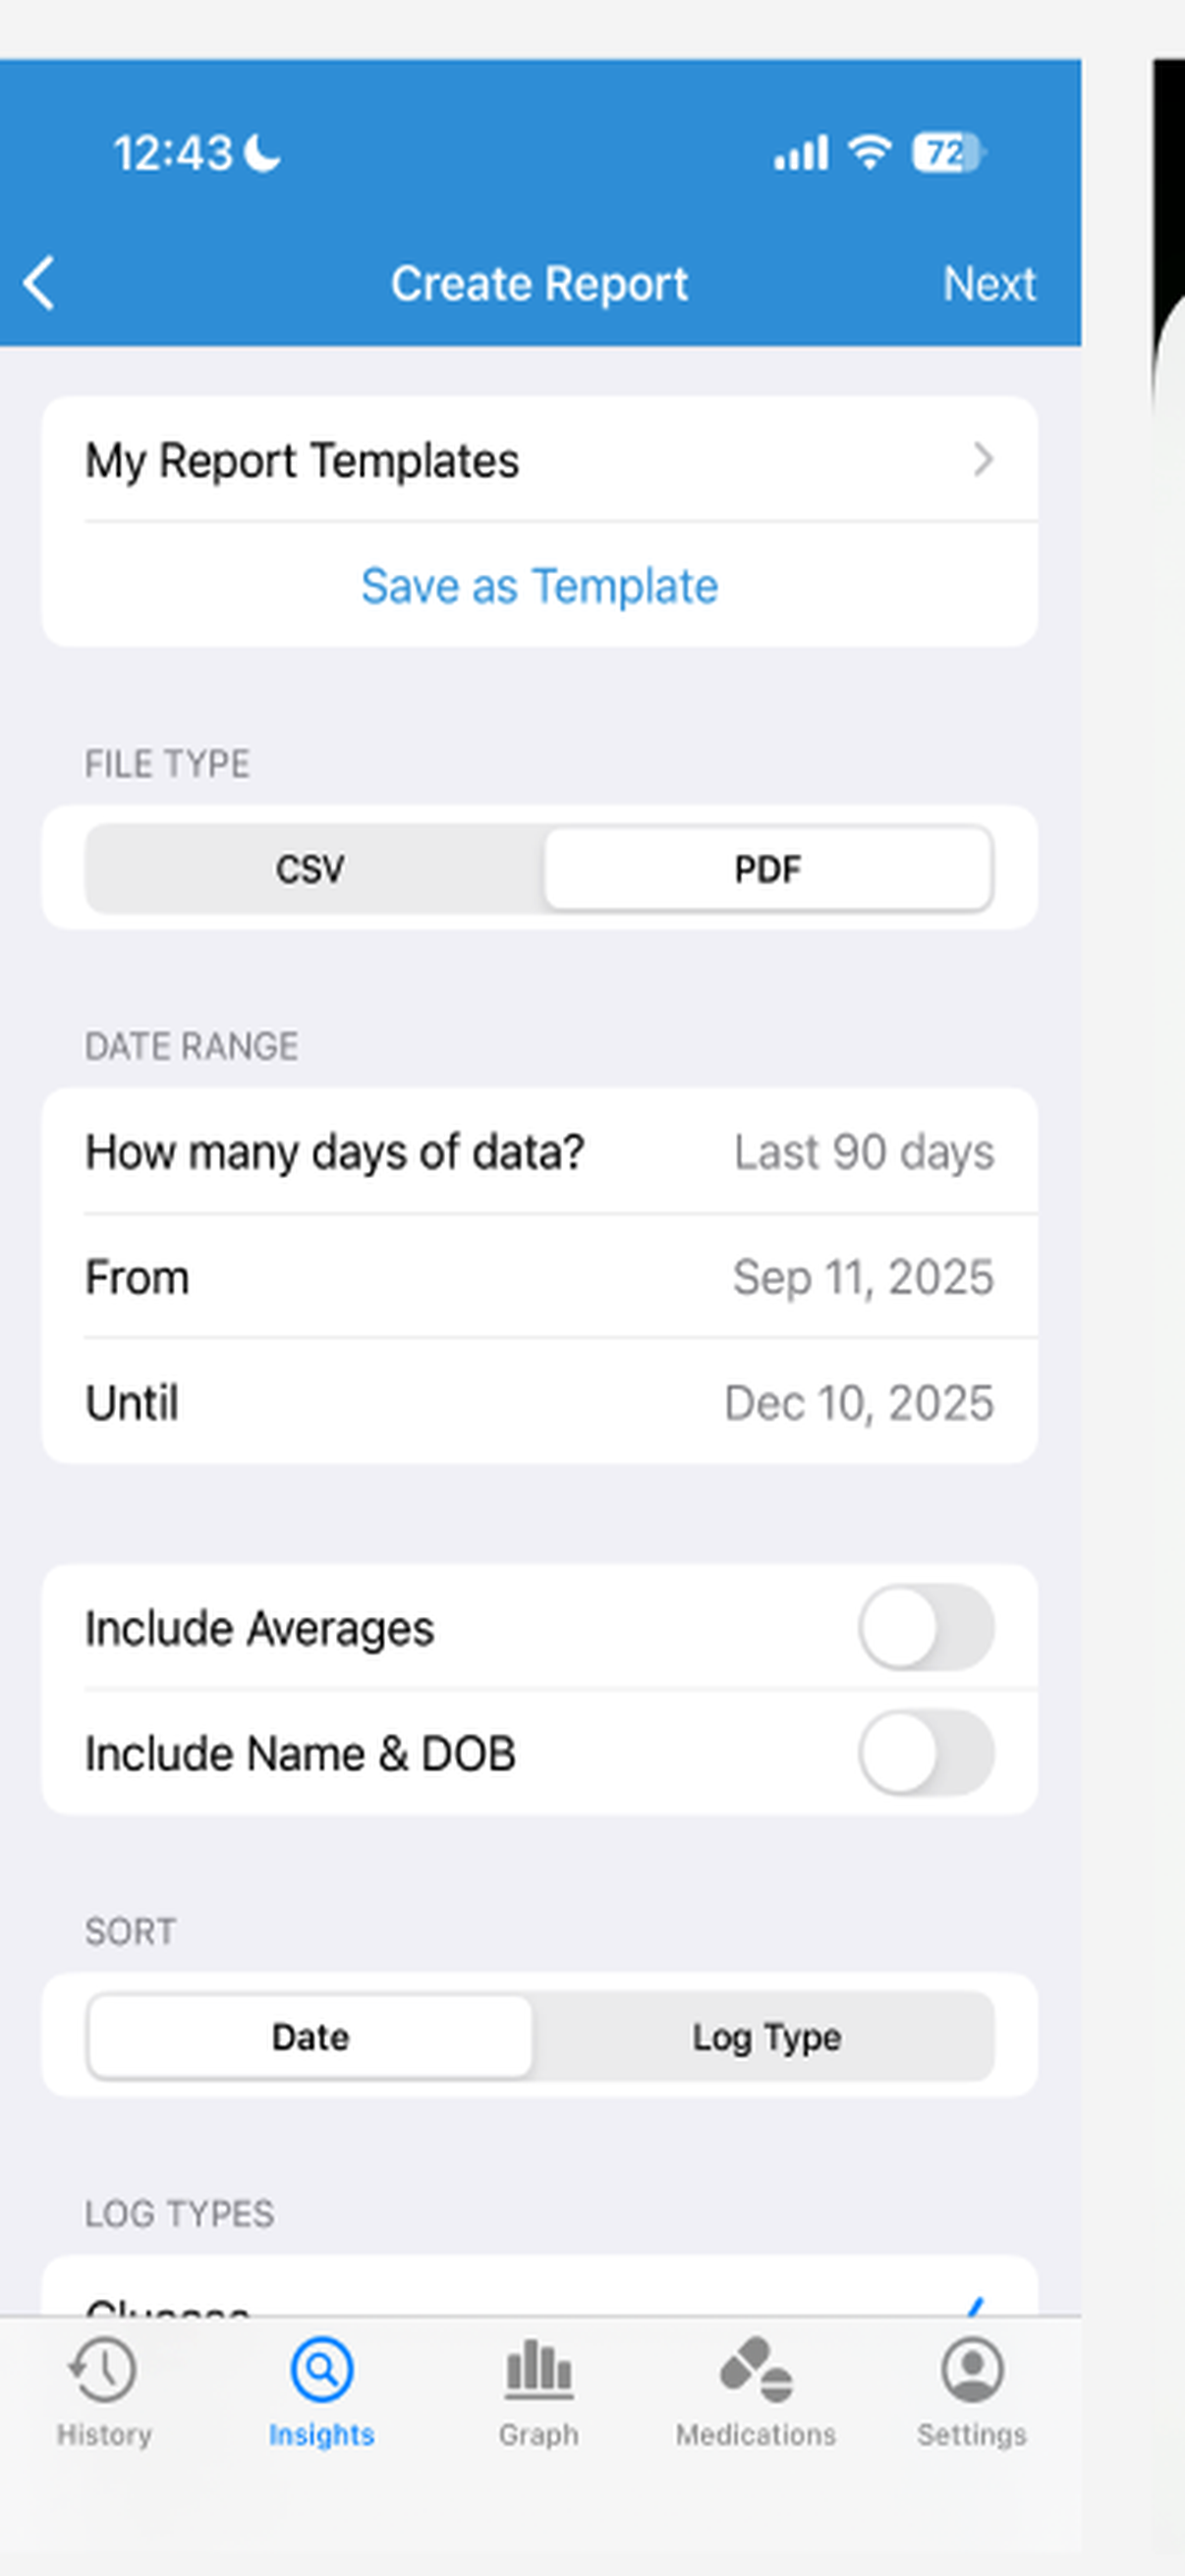
The report builder groups the choices that affect what the recipient will see. Labels and availability can vary by app version or plan. Choose PDF or CSV for the recipient
Use PDF when someone needs a readable document for an appointment or record. Use CSV when the recipient specifically wants individual rows for a spreadsheet or another system.
- PDF is the safer default when no format was requested.
- CSV is better for analysis but is less readable at a glance.
- If you are unsure, ask the recipient before sharing sensitive data twice.
Select the period, logs, and sorting
Choose the reporting period and only the log types needed for the discussion. Sort by date for a chronological review or by log type when the recipient needs grouped records. Enable averages only when they add useful context.
Include personal details only when needed
Turn on your name and date of birth when the clinic needs them to identify the report. Leave them out when you are creating a personal copy or demonstrating a technical problem to support.
Check the generated report before sharing
Open the generated file and verify it as if you were the recipient. A successful report should open normally and show the intended person, date range, glucose unit, and selected records.
- Confirm mg/dL or mmol/L is correct.
- Check the first and last dates in the report.
- Look for obviously missing or duplicated records.
- Confirm personal details are present only when intended.
Save repeated choices as a template
If you regularly create the same kind of report, use Save as Template when that option is available. Give the template a purpose-based name, then review the dates each time before generating a new file.
Troubleshooting
Fix the most common report problems
Most report issues come from the selected range, filters, units, or file format. Check those before recreating the report repeatedly.
- The report is empty
- Open History and confirm that records exist inside the selected dates. Return to the builder, widen the range, and make sure at least one relevant log type is included.
- Recent entries are missing
- Confirm the entries are visible in History and that the report’s ending date includes them. Generate a new file after correcting the range rather than resharing the earlier copy.
- The glucose unit is wrong
- Check the preferred glucose unit in Settings, confirm existing records display correctly in History, and regenerate the report. Do not manually relabel values in the exported file.
- The recipient cannot open the file
- Try PDF for a broadly readable document. Save the file to Files and open it yourself before sending again. Use CSV only when the recipient expects spreadsheet data.
- An option is unavailable
- Review the current purchase screen to see whether that format or advanced option requires a subscription. Available reporting features can vary by plan and app version.